Video Insight- VMS Integration Configuration
The following guide provides steps to configure and integrate to the Video Insight VMS in the Symphony AC Software. Considerations Prior to Setup This guide will assist you in setting up the Video Insight VMS integration in Symphony AC. The Video Manager add-on module for Symphony AC is required. You must be logged into Windows with a user account that will be used to run the Symphony AC Video Driver. Typically, this is the installer account for Symphony AC. Setting Up the Video Insight Video Driver I. Setting Up the Video Insight Controller
- Launch Symphony AC and navigate to the Hardware Manager module. Unlock the module by clicking the lock in the command toolbar. Right click in the hardware tree and select “Edit” to display the “Add Driver” command from the popup menu. Click on “Add Driver” to view the “Add a New Driver” popup menu. (See Figure 1)
Figure 1: 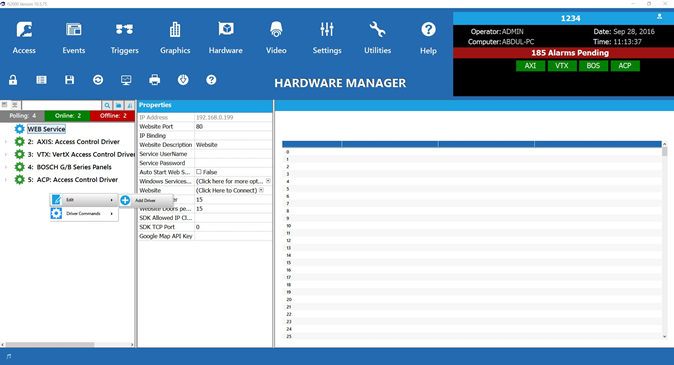
- From the “New Driver” popup menu, click on the “DVR/NVR Video Drivers” category. Select the “Video Driver (AXIS Camera station, Milestone, ONSSI, Video Insight, Vicon)”. Click the OK (See Figure 2)
Figure 2: 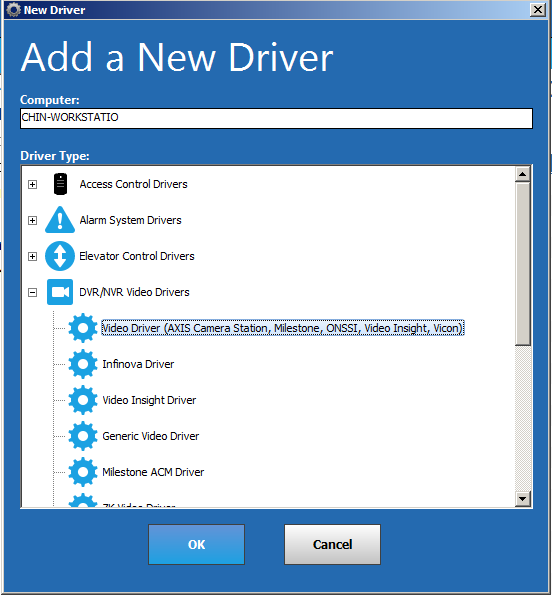
- Set the “Service username” and “Service Password” for the Driver. This is typically a Windows Administrator user account that will be used to run the driver as a Windows Service. Click Save. (See Figure 3)
Note: If using a domain account, enter the full name. In the example below, the full name is: (Senstar\Symphony ACServiceAccount).
Figure 3 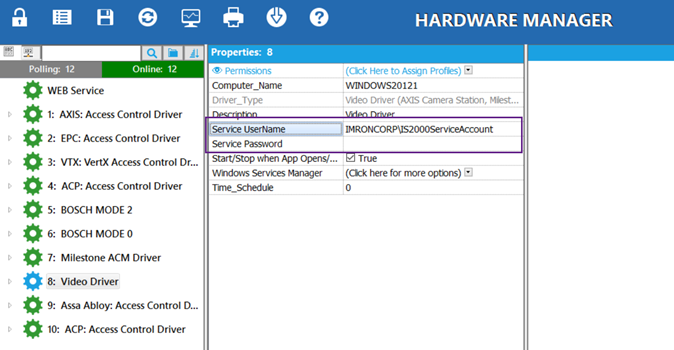
- Select the driver from the hardware tree. Right click on the driver to bring up the popup menu, in the “Driver Commands” menu select “Start Driver”. (Gear icon will turn Green)
Once the driver is running right click on the driver and from the “Edit” menu select “Add Controller.” (See Figure 4) Figure 4: 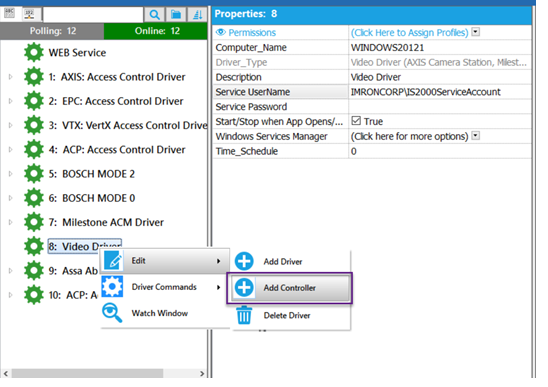
- Controller(s) can be added manually one at a time using the manual setup. Select the controller type (here, the Video Insight controller). Select the Controller Address from the drop-down menu and the Controller Group from the drop down menu.
Click the “OK” button below to continue. (See Figure 5)
Figure 5: 
- Click on the Video Insight controller to access the controller properties (See Figure 6).
Fill out the following information: IP Address User Name NVR Password Data Port Command Port Time Zone Figure 6 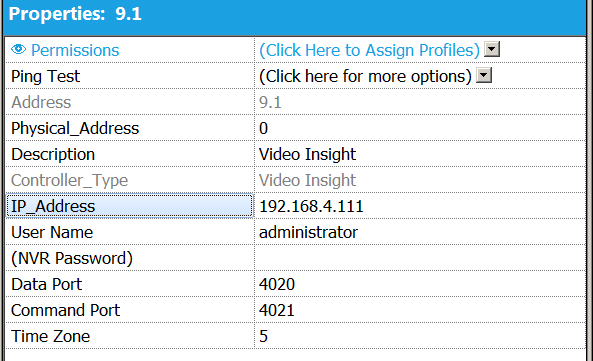
- Restart the video driver (i.e. right click on the video driver and select “Driver Commands”. Click on the “Stop Driver” command. Once the driver stops, click on the “Start Driver” command). This will auto-populate the cameras that are available from the Video Insight Server. (See Figure 7)
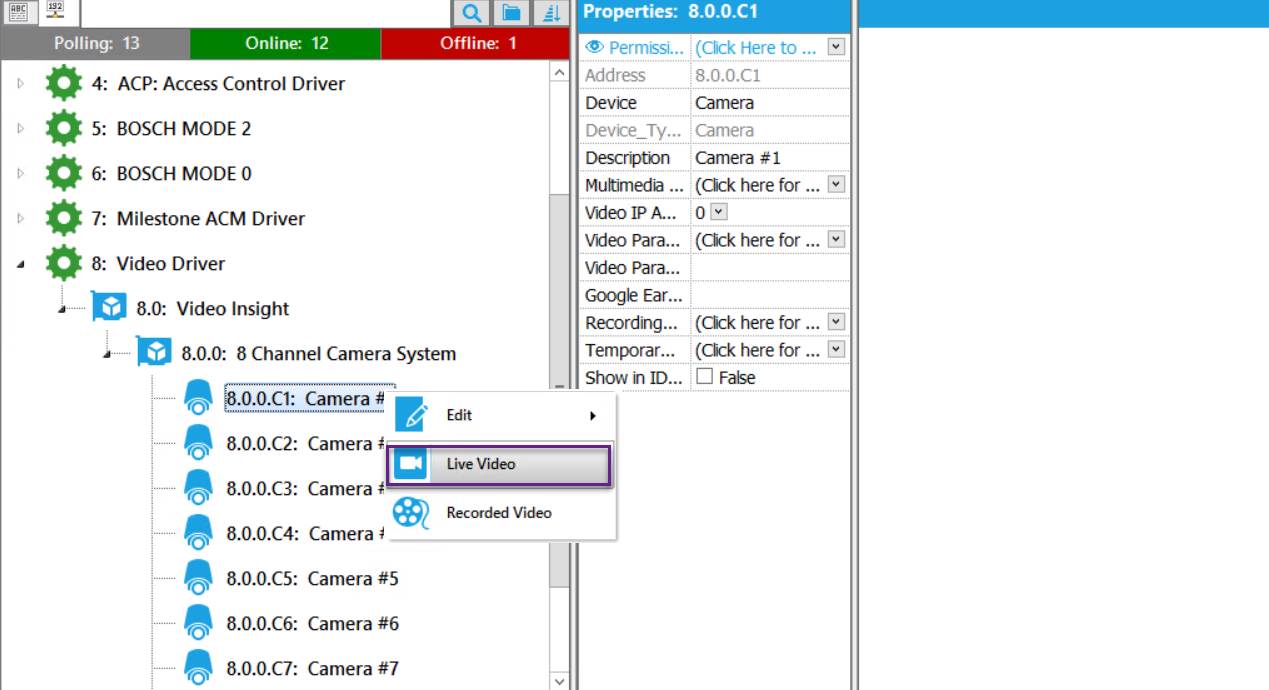
Figure 7 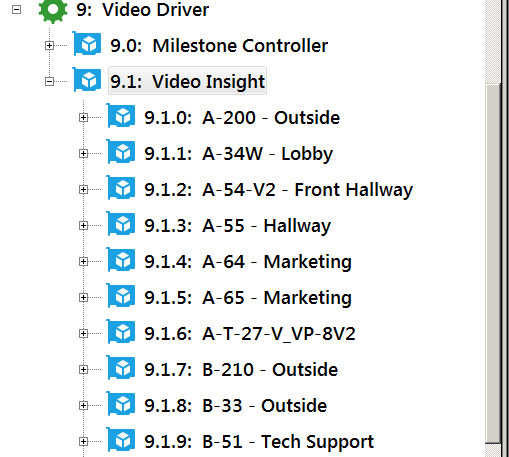 II. Calling Up Live Video To call up live video, locate the camera in the hardware manager. Right click on the camera and click on “Live Video”. (See Figure 8) Figure 8