exacqVision
A. Installing the exacVision Client
- Install the exacqVision client on the system that will be running Symphony AC with video. Open the exacqVision installer. You will be asked which components you wish to install. Install only the Client and click Install. (See Figure 1)
Figure 1 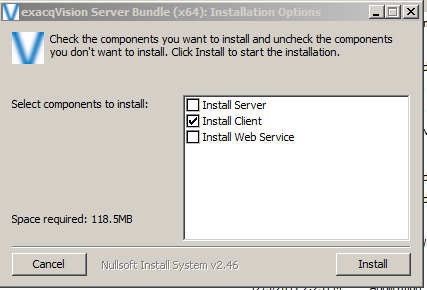
- Once the installation is complete, you will see the Client Setup Wizard. Click Next. (See Figure 2)
Figure 2 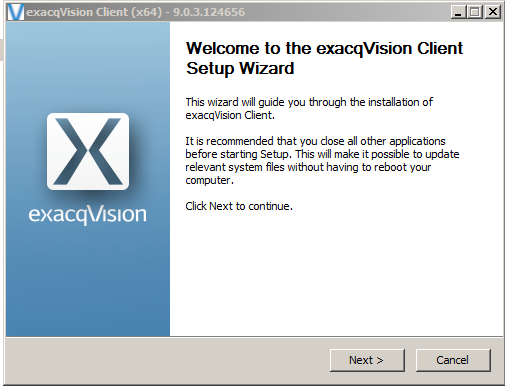
- Accept the License Agreement. Click Next. (See Figure 3)
Figure 3 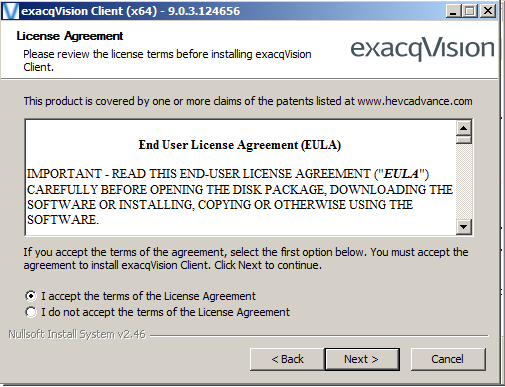
- Ensure that the install directory is “C:\Program Files\exacqVision\Client”. Click “Next”. (See Figure 4)
Figure 4 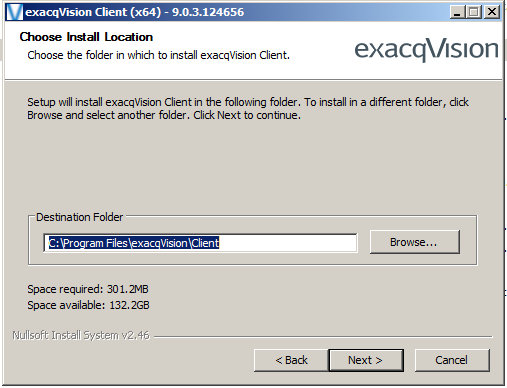
- You will choose the features of the exacqVision client you want to install. The Client is the only option that is required, but you may install the other options if you wish. Click Install. The client will begin installing. (See Figure 5)
Figure 5 
- Once the installation is complete, click Finish. (See Figure 6)
Figure 6 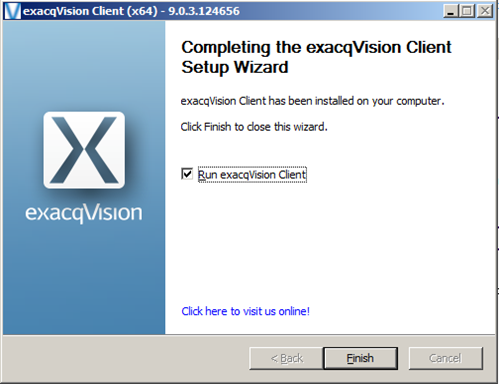
B. Adding the exacqVision driver to Symphony AC
- Open Symphony AC. Go to the Hardware Manager. Unlock the module by clicking on the lock icon.
- Right click on the hardware tree. Go to Edit and then “Add Driver”. (See Figure 7)
Figure 7 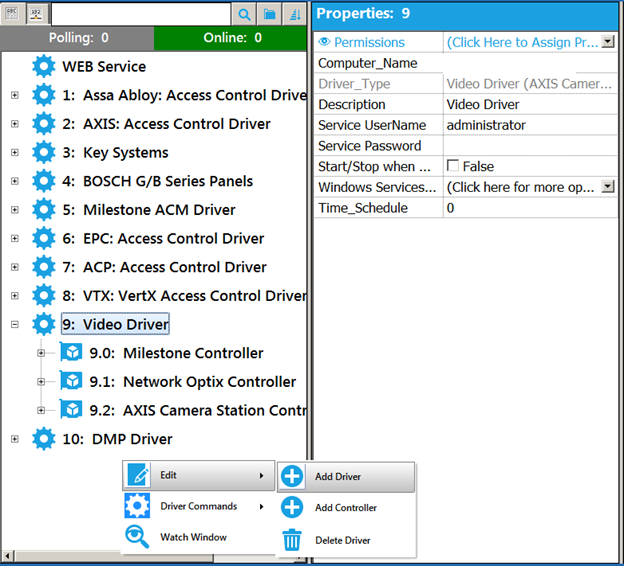
- Under the DVR/NVR Video Drivers category, select “Video Driver” and click “OK”. (See Figure 8)
Figure 8 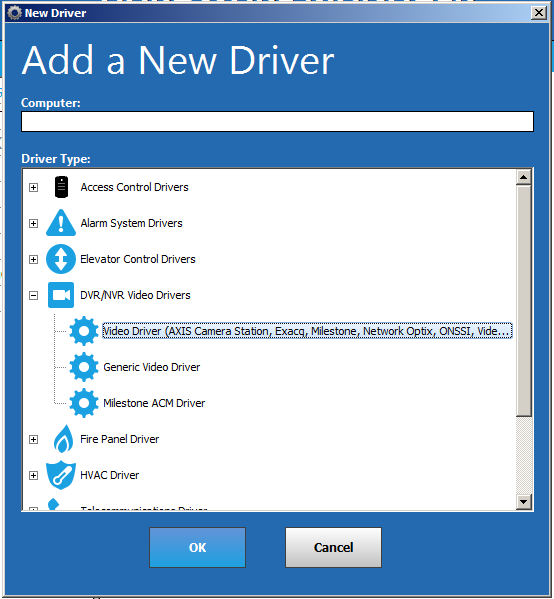
C. Adding the exacqVision Controller
- In the hardware tree, select the “Video Driver” and right click on the “Video Driver”. Select “Edit” and click “Add Controller”. (See Figure 9)
Figure 9 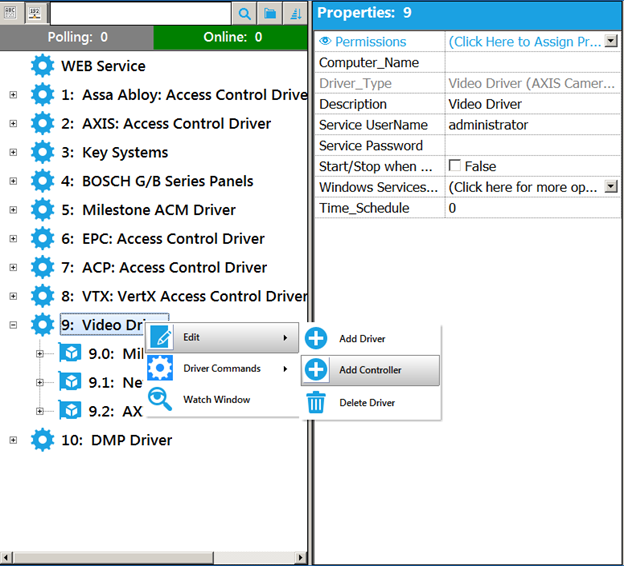
- In the controller type field, select the “Exacq Controller”. Click “OK” to add the controller. (See Figure 10)
Figure 10 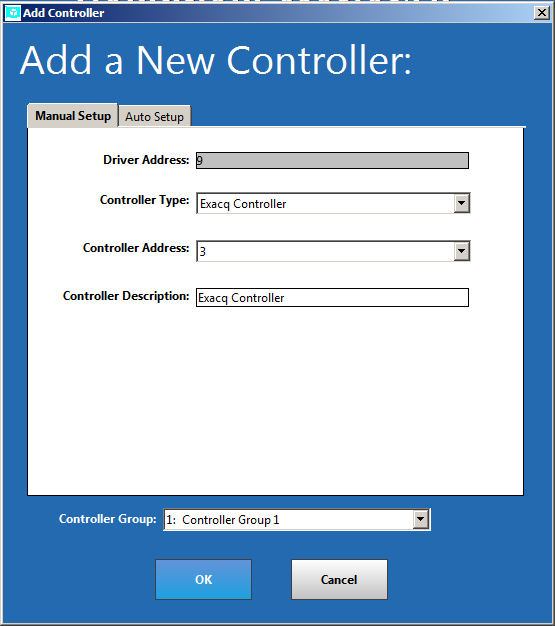
- Open the exacqVision Client and go to the Config (Setup) page by clicking on the corresponding icon. Copy the IP address of the exacqVision Server under the IP Address field. (See Figure 11)
Note: if you have multiple controllers, you will need to copy multiple IP Addresses. Figure 11 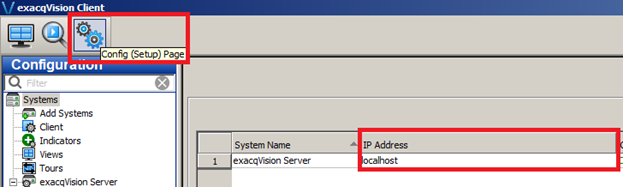
- In the hardware tree, select the newly added Exacq Controller. Under the properties for the Exacq Controller, fill in the IP_Address field with the IP address you copied in step 3. In the Data Port field, enter the exacqVision web service port (the default value is 22609). Enter the username and password you wish to use to view video in the exacqVision Client. (See Figure 12)
Figure 12 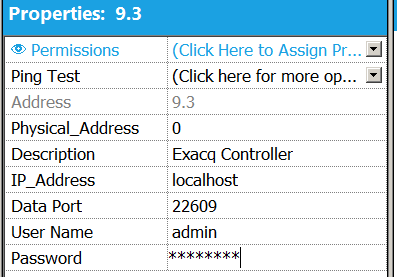
- Click the Save button (I.e. the floppy disk).
D. Adding Cameras to Symphony AC
- In the hardware manager, make sure the hardware module is unlocked (I.e. by clicking the lock icon).
- Select the Exacq controller. Right click on the controller and click “Edit” and click on “Add-Subcontroller”. (See Figure 13)
Figure 13 
- You will see the New Sub-Controller screen. Under the Sub-Controller Type, select “Single Channel IP Camera” and click the checkmark. (See Figure 14)
Figure 14 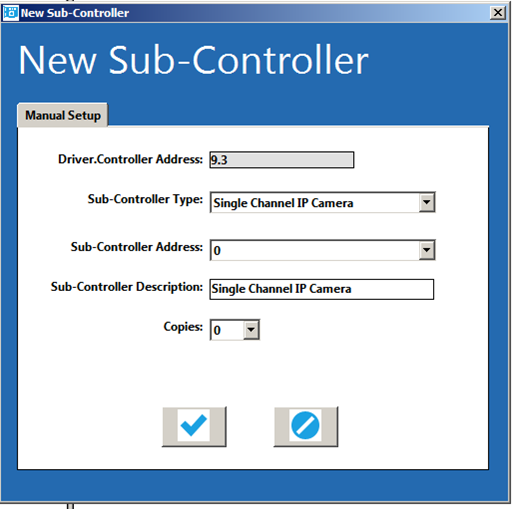
- In the hardware tree, locate the camera corresponding to the Exacq controller. In the Camera properties, you will need to fill in the Video Parameters field with the Camera ID. (See Figure 15)
Figure 15 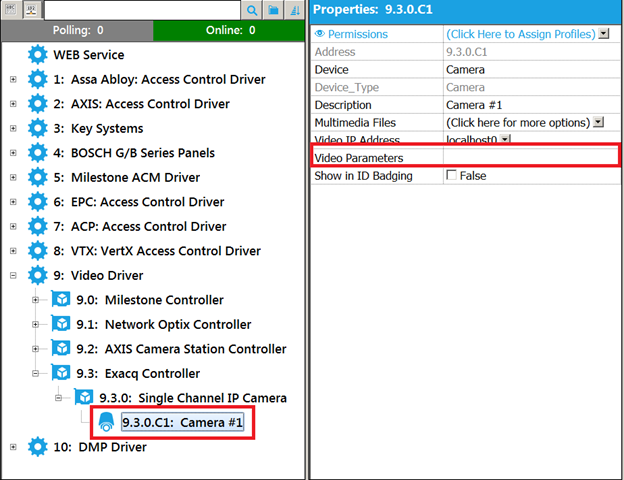
- To locate the Camera ID, navigate to the exacVision Client. Go to the Live Cameras mode and drag the appropriate camera into view. (See Figure 16)
Figure 16 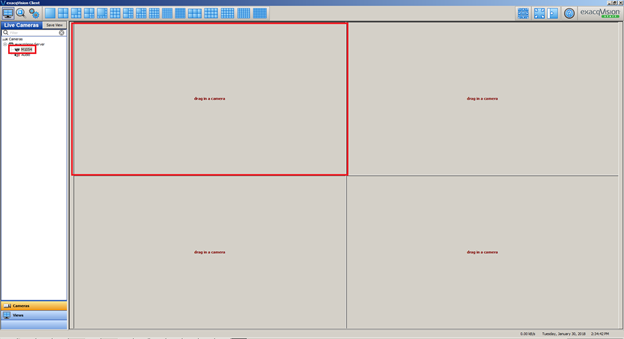
- After you have dragged the appropriate camera into view, right click on the camera and select properties. (See Figure 17)
Figure 17 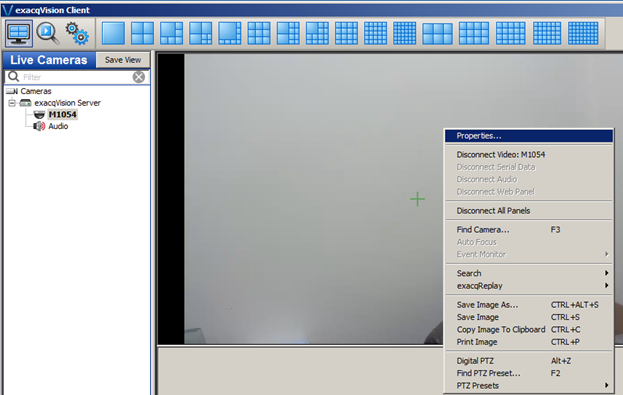
- The Camera ID to use is the decimal number. Enter this number into the Video Parameters field identified in Step 4. (See Figure 18)
Figure 18 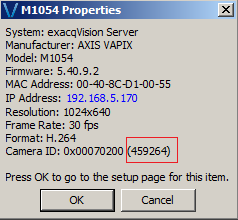
- Click Save.