Server Installation
Symphony AC Server - New Installation
Prior Considerations Please ensure that you have completed the following BEFORE installing/upgrading Symphony AC:
- Ensure that you have the appropriate port opened (Inbound and Outbound) to allow Symphony AC to talk to the respective hardware. The appropriate ports are as follows:
- Axis hardware: 80
- Aero hardware: 3001
- HID/VertX: 4050, 4070
- ZK: 4370
- Bosch: 3001, 7700
- If you are using an anti-virus program or firewall, temporarily disable your anti-virus and firewall (if any) prior to the installation. After you install Symphony AC, add an exception in the firewall for Symphony AC and exclude the Symphony AC folder (typically C:\Program Files(x86)\Symphony AC) and any Symphony AC sub-folders from the anti-virus software. Re-enable your firewall and antivirus.
- Requires SQL Server to install the Symphony AC database. Please make sure you have an MS SQL Server available after the Symphony AC installation
Installation Procedures:
- Please log into Windows with a Windows Admin User Account.
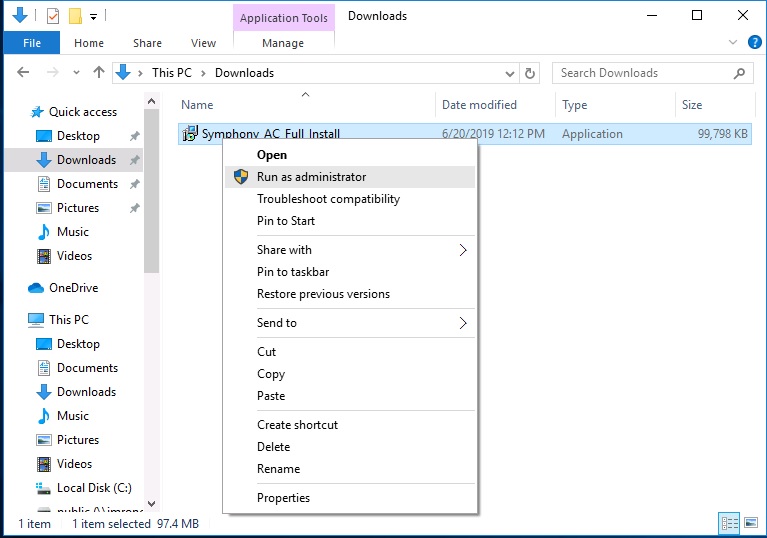
- Download the full install for Symphony AC.
- After the download has completed, right-click on the “Symphony AC_Full_Install.exe” file then click “Run as administrator”
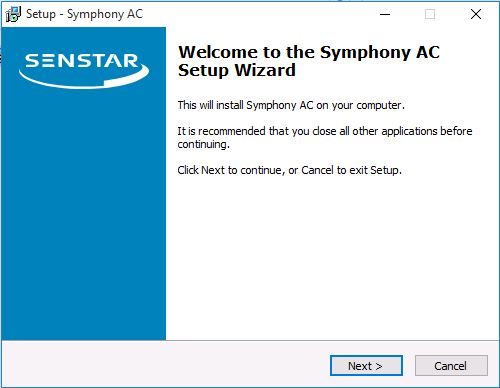
- In the Welcome to the Symphony AC Setup Wizard, click “Next”
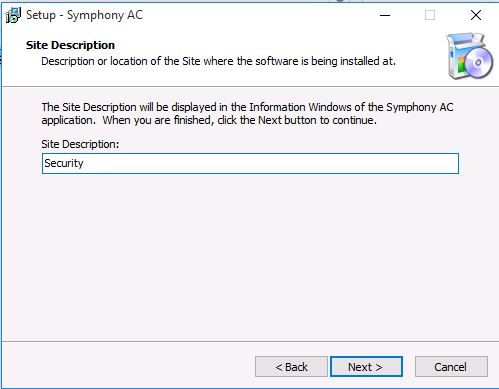
- In the Site Description window, enter a Site Description (for example: My Site) and click “Next”
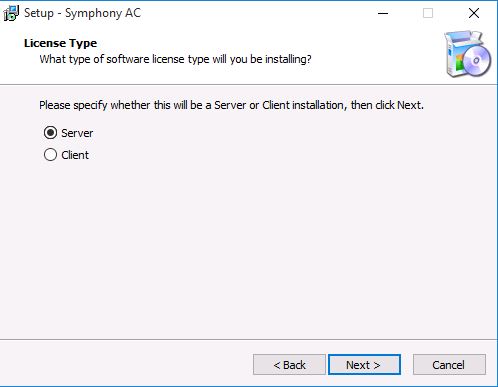
- In the License Type window, select “Server” and click “Next”
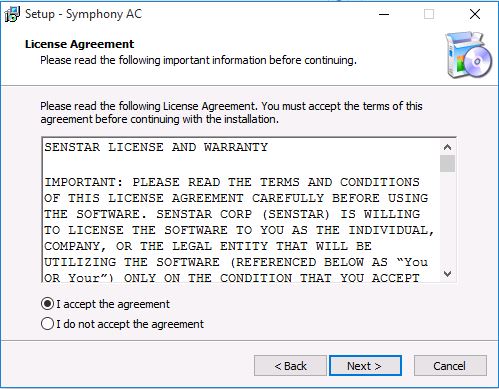
- In the License Agreement window, select “I accept the agreement” after reading the document and then click “Next”
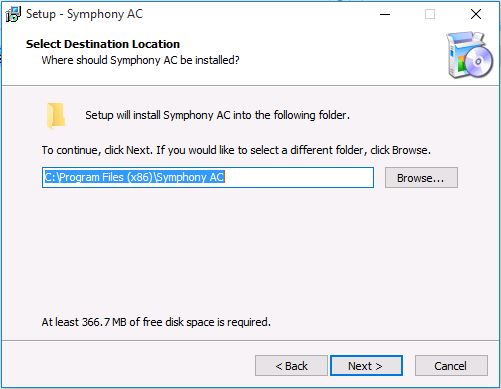
- In the Select Destination Location window, specify an installation path and click “Next”
- In the Ready to Install window, verify everything is correct then click “Install”

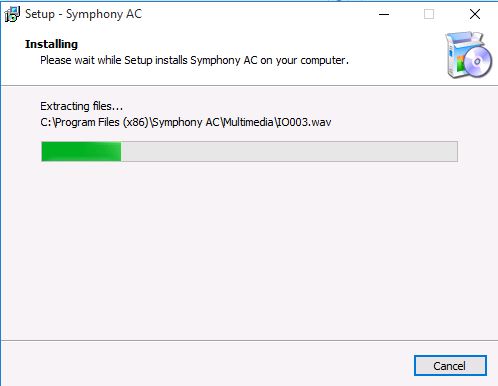
- The full install should take a few minutes....
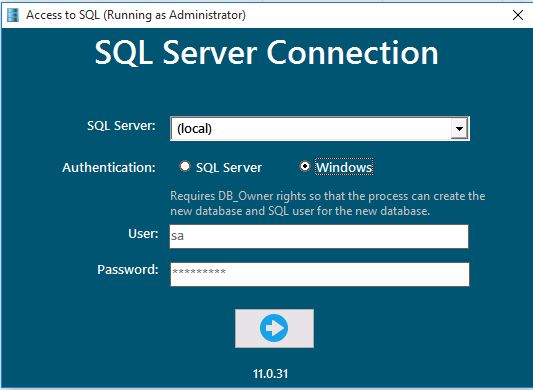
- After the full install, the Access to SQL window will display. Please enter a the SQL Server name and select 'Windows' Authentication. Alternatively you can select 'SQL Server' as your authentication method. You'll need to specify the User/Password for the authenticatio method.
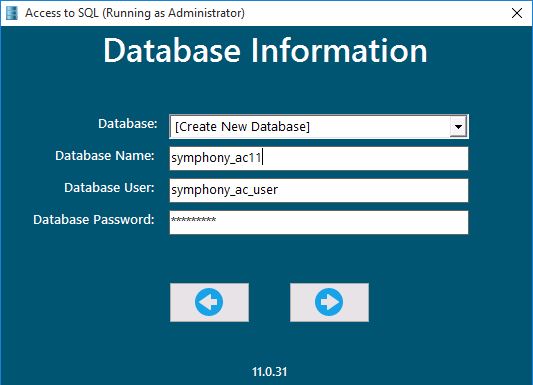
- Next, in the Database Information window, specify a password for the database user 'symphony_ac_user'. Please use a complex password of letters, numbers and special character. Leave all other fields as is and click the right Arrow
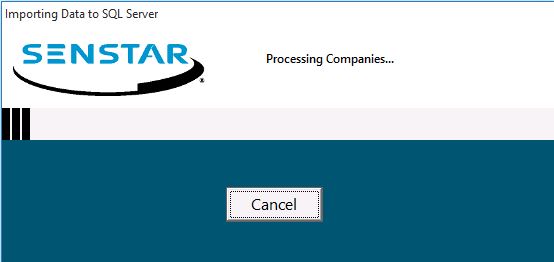
- Next, the Importing Data to SQL Server window will display. Allow this to complete.
- In the Registration Wizard window, select “No Dongle: Use Registration Code to Unlock”.
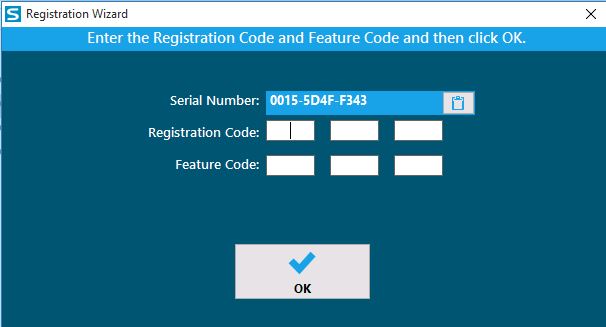
- Email support@Senstar.com with the Serial Number. Leave this window opened until you receive your Registration/Feature Codes.
- Enter the Registration and Feature Code provided to you from Senstar Support then click “OK”.
- You should see the Dongle Wizard Window notifying you the Registration Code was successfully entered. Click “OK”.
- Click “Finish” to complete the installation.
- On the Desktop, right-click the “Symphony AC” Icon and click on “Run as administrator”. Once Symphony AC starts, the Maintenance File Could Not be Found window will ask you to check online for a maintenance file. Click “Yes”.
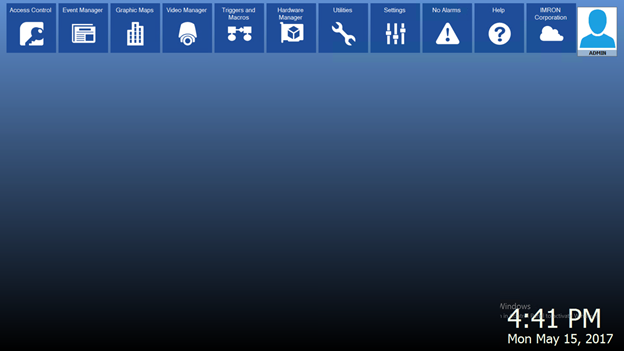
- Symphony AC will start in the Desktop Mode and is now ready to be configured.
To Switch to Application Mode:
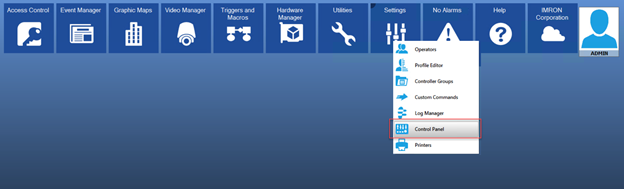
- Click the “Settings” Tab and then click “Control Panel”.
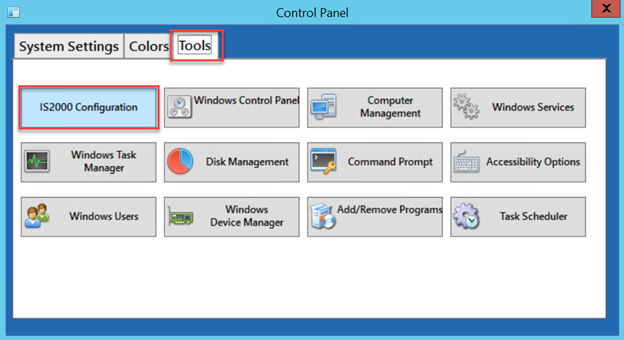
- In the Control Panel window, click on the Tools tab and then select “Symphony AC Configuration”.
- In the Configuration Options window, scroll down to the “Running as a Service” menu and next to the “AutoLogon” option, uncheck the box so it reads “False” and click “Save Changes”.
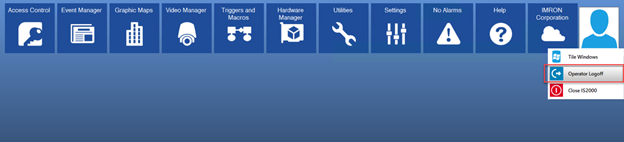
- Log off by clicking on the “User Name” Icon and then click “Operator Logoff”
- On the Operator Logon Screen, enter the operator and password information. By default, Operator is “Admin” and Password is blank. Select “Application Mode” and then click the “Logon” button.
- You are now running Symphony AC in Application mode.
- To return to Desktop mode, log off by clicking the Operator Log off Icon on the Information window then select Desktop mode and log back in.